Spring-Hinged Glasses Case and Ring Box Shell
 di Reavenk


File stampabili (8)
-
 stl
stlSpring.stl
6 Ko · 513 download
-
 stl
stlHinge_Pushfit.stl
163 Ko · 524 download
-
 stl
stlGlassesCase_Top.stl
129 Ko · 466 download
-
 stl
stlGlassesCase_Bottom.stl
113 Ko · 457 download
-
 stl
stlGlassesCase_TopDeeper.stl
132 Ko · 440 download
-
 stl
stlGlassesCase_BottomDeeper.stl
116 Ko · 426 download
-
 stl
stlHinge_Buckle.stl
197 Ko · 448 download
-
 stl
stlRingBoxShell.stl
79 Ko · 413 download
Descrizione
Exploring the bi-stable hinges that are common in ring boxes and glasses cases. All 3D printed, some assembly required.
Demo and assemblies at https://youtu.be/JWIdNfnB3O8
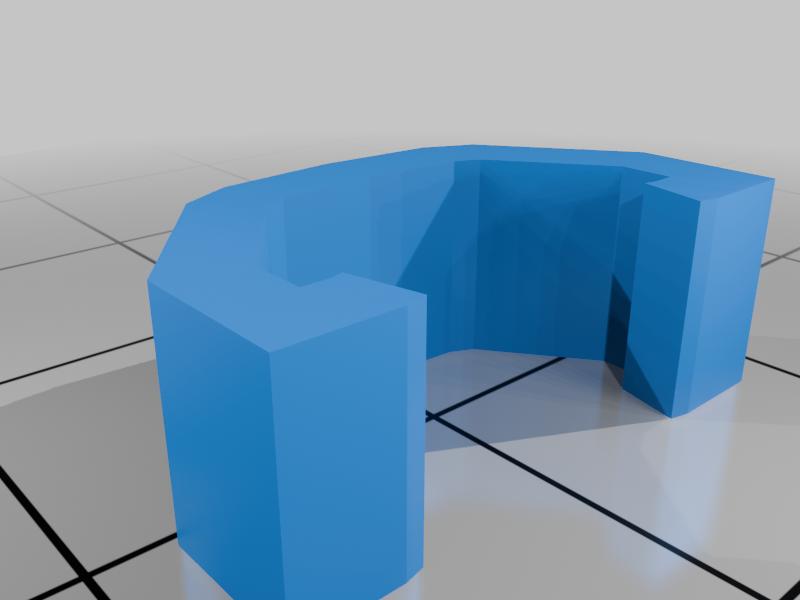
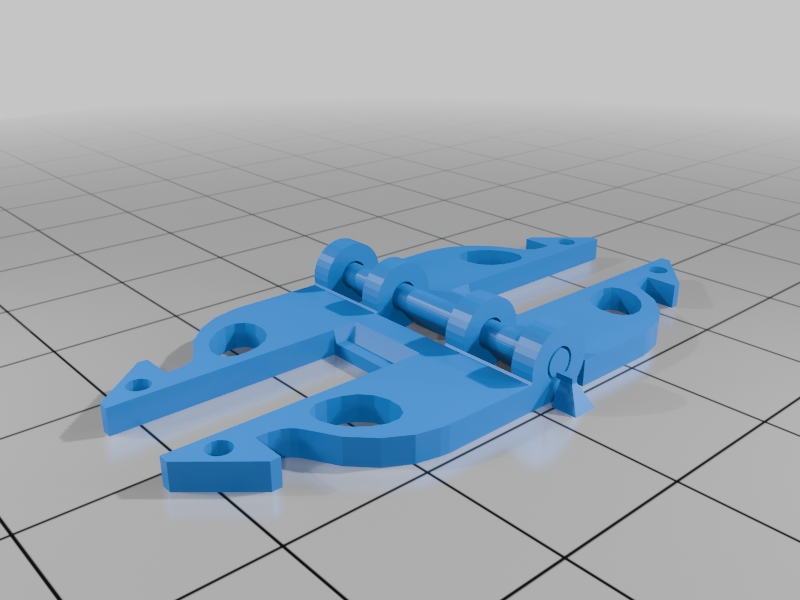
The project uses C-shaped springs that clamp onto print-in-place hinges. The springs are print-in-place but require being snapped into the box. The springs give the hinges a bi-stable property that holds a little past the 0 and 90 degrees bend.
The exploration has two hinge snap-in mechanisms: a simple wedge and a buckle design. They're used for two different types of boxes: one resembling a ring box shell and one for a glasses case.
The ring box is not considered a finished product, just an additional proof of concept for the hinges. I didn't do the internal of the ring box (the insert that actually holds the ring) because I tried with TPU, it eventually jammed the nozzle, and I rediscovered why I don't like toying with TPU.
PrintingAll parts are already oriented correctly for printing, with the right side facing the bed. No supports required.
- Box parts and hinges can be printed in any typical plastic, such as PLA or PETG.
- The springs should be printed in PETG. PLA will wear down and creep faster, and have significantly less spring force after a short while.
- Make sure the
Springs are sliced completely as perimeter paths.
The parts for each box are listed below. Note that each box type uses a specific hinge type.
Ring Box
RingBoxShell- x2
Hinge_Buckle- x2
Spring- x2
- PETG recommended
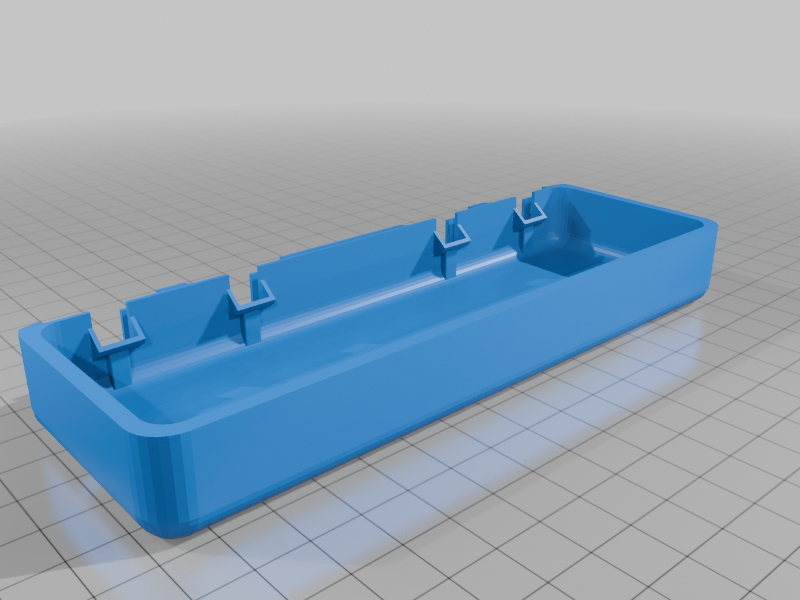
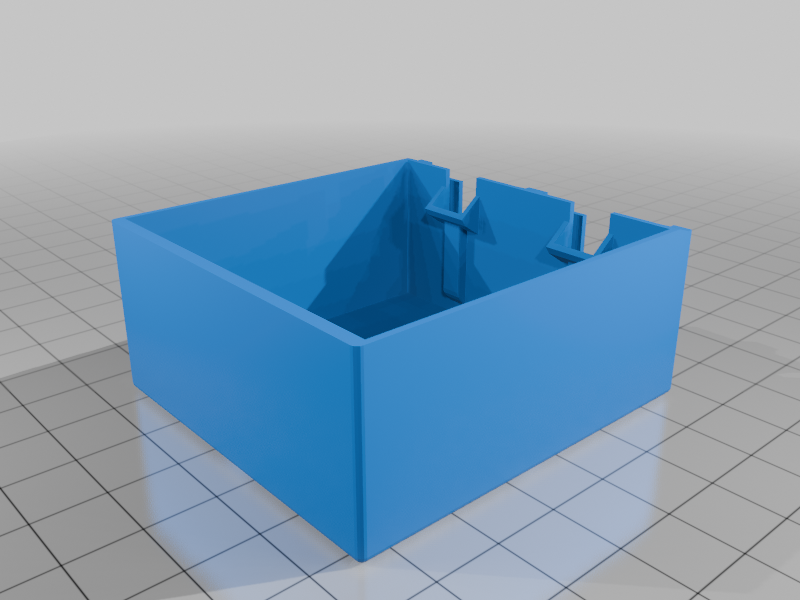
Glasses Case
There are two designs; one has a bit more depth and includes the postfix (Deeper) in the filenames. If you can get away with the smaller case design, that's recommended, as it weighs less, so it weighs down the springs less.
GlassesCase_Top- x1
GlassesCase_Bottom- x1
Hinge_Pushfit- x4
Spring- x4
- PETG recommended
See the project video for more details on assembly.
- Remove the modeled-in supports from the ends of the hinges.
- Slowly rotate the hinges to break any bonds in the center of the print-in-place hinges.
- Rotate the hinges repeatedly to exercise them.
- Install the C-shaped springs onto all the hinges.
- The ends of the C shape should engage with the indents.
- i.e., When the hinge is flat, the middle of the C shape should face towards the flat side.
- Place the hinges onto the bottom box part. Force will be required; be careful not to break any significant bits. For the push-fit, if parts of the wedges get chipped/shaved off, it should be fine.
- The middle of the C shape should face towards the inside of the box.
- Note that the hinges can be inserted from either vertical side, but there's a non-symmetrical gap in the middle. So insert the hinges so that the gap placement is symmetrical. However, this doesn't hurt functionality if they're not symmetrical.
- Align the other top box part onto the open ends of the hinges and push it into place. Because this involves multiple hinges at a time, more force will probably be required than for the previous individual hinges. Be careful not to apply harsh diagonal pressure to the hinges.
The springs will be very strong at first, but will gradually weaken up to a certain point. Afterwards, the strength seems to be stable. Although (as of writing) it's only been a week of observation, so it's uncertain what will happen in the long term.
PLA springs will "technically" work, but will be weaker and degrade significantly more over time.
There will be creaking (when bending the hinges) when the thing is first assembled. I'm not too happy about that because it's slightly like nails on a chalkboard. I'm not sure exactly where it's coming from, but it has disappeared from my oldest assembled case. I'm hoping it's a normal thing for it to disappear over time. There are also hinge-popping sounds that will remain.