Core XY Printer (mini)
 par MacGyverr


Fichiers imprimables (47)
-
 stl
stlCarriage_front.stl
182 Ko · 2 661 téléchargements
-
stl
Carriage_Y-left.stl
203 Ko · 2 638 téléchargements
-
stl
Fan_duct.stl
481 Ko · 2 622 téléchargements
-
stl
Bed_Mount_Right.stl
288 Ko · 2 632 téléchargements
-
stl
Top_back_right_corner.stl
188 Ko · 2 642 téléchargements
-
stl
Carriage_sensor_mount.stl
44 Ko · 2 618 téléchargements
-
stl
Carriage_back.stl
132 Ko · 2 655 téléchargements
-
stl
Z_Arm_Mount_Right.stl
63 Ko · 2 652 téléchargements
-
stl
Carriage_Y-left_bearing_cover.stl
106 Ko · 2 641 téléchargements
-
stl
Z_Bottom_Left.stl
29 Ko · 2 633 téléchargements
-
stl
LCD_Mount_Left.stl
26 Ko · 2 630 téléchargements
-
stl
Z_Bottom_Right.stl
29 Ko · 2 625 téléchargements
-
stl
Lower_Corner_x3.stl
48 Ko · 2 646 téléchargements
-
stl
LCD2004_Cover.stl
131 Ko · 2 637 téléchargements
-
stl
Carriage_Y-right.stl
208 Ko · 2 629 téléchargements
-
stl
Z_Arm_Stabilizer_Front.stl
85 Ko · 2 615 téléchargements
-
stl
Carriage_middle.stl
108 Ko · 2 635 téléchargements
-
stl
Bed_Mount_Left.stl
1007 Ko · 2 624 téléchargements
-
stl
Top_front_left_corner.stl
185 Ko · 2 641 téléchargements
-
stl
Spool_Holder_1of2.stl
262 Ko · 2 620 téléchargements
-
stl
Bed_Spring_Caps.stl
588 Ko · 2 613 téléchargements
-
stl
Top_front_right_corner.stl
298 Ko · 2 628 téléchargements
-
stl
Hotend_Mount_2of2.stl
101 Ko · 2 623 téléchargements
-
stl
Z_Arm_Mount_Left.stl
63 Ko · 2 618 téléchargements
-
stl
Spool_Holder_2of2.stl
86 Ko · 2 618 téléchargements
-
stl
Top_back_left_corner.stl
178 Ko · 2 627 téléchargements
-
stl
Z_Screwdrive_Middle.stl
190 Ko · 2 632 téléchargements
-
stl
Z_Top_Left.stl
39 Ko · 2 624 téléchargements
-
stl
LCD_Mount_Right.stl
26 Ko · 2 623 téléchargements
-
stl
Z_Top_Right.stl
38 Ko · 2 628 téléchargements
-
stl
Hotend_Mount_1of2.stl
69 Ko · 2 618 téléchargements
-
stl
Carriage_Y-right_bearing_cover.stl
110 Ko · 2 630 téléchargements
-
stl
Bed_Thumbwheels.stl
405 Ko · 2 249 téléchargements
-
stl
Lower_Back_Right_Corner_with_Plug_Cutout.stl
949 Ko · 2 633 téléchargements
-
stl
Adjustable_Y_Endstop.stl
33 Ko · 2 645 téléchargements
-
stl
CoreXY_whole_model.stl
33.4 Mo · 2 353 téléchargements
-
stl
Full_Layout_1of5.stl
3.8 Mo · 2 267 téléchargements
-
stl
Full_Layout_2of5.stl
1.4 Mo · 2 247 téléchargements
-
stl
Full_Layout_3of5.stl
849 Ko · 2 249 téléchargements
-
stl
Full_Layout_4of5.stl
409 Ko · 2 240 téléchargements
-
stl
Full_Layout_5of5.stl
478 Ko · 2 249 téléchargements
-
stl
Full_Layout_6of6_LCD2004_knob_version.stl
354 Ko · 2 017 téléchargements
-
stl
LCD2004_Cover_knob.stl
114 Ko · 2 030 téléchargements
-
stl
LCD2004_Back_knob.stl
124 Ko · 2 028 téléchargements
-
stl
LCD_Mount_Left_knob.stl
58 Ko · 2 016 téléchargements
-
stl
LCD_Mount_Right_knob.stl
58 Ko · 2 034 téléchargements
-
 stl
stlANET_CoreXY_Piezo_Head_WIP.stl
955 Ko · 188 téléchargements
Description
https://youtu.be/bBFfMA0Oj6U
https://youtu.be/lLvmaVk5XrE
https://youtu.be/PqBDcfrTDcI
So I upgraded my ANET A4 to a 32-bit SKR v1.3 , 0.9 degree steppers, optical endstops and changed the original power-supply to 24v, and was wondering what to do with the extra parts so I decided to make a Core XY.
So here is what you could call an ANET Core XY (technically it's a Core YX). It is running Marlin 1.1.9 and has an SN4 induction sensor, an E3Dv6 with a removable magnetic build plate (cut down from an Ender replacement).
Marlin source changes are now in the download. (some settings are just because I'm recycling an old ANET board)
I added the Cura 4.3.0 settings I use. (it shows up under the images)
Yes it was made from hacking and remixing various models with Tinkercad, but some parts were made completely from scratch in Tinkercad (like the entire X-axis).
https://www.tinkercad.com/things/c1y6VWAC95D
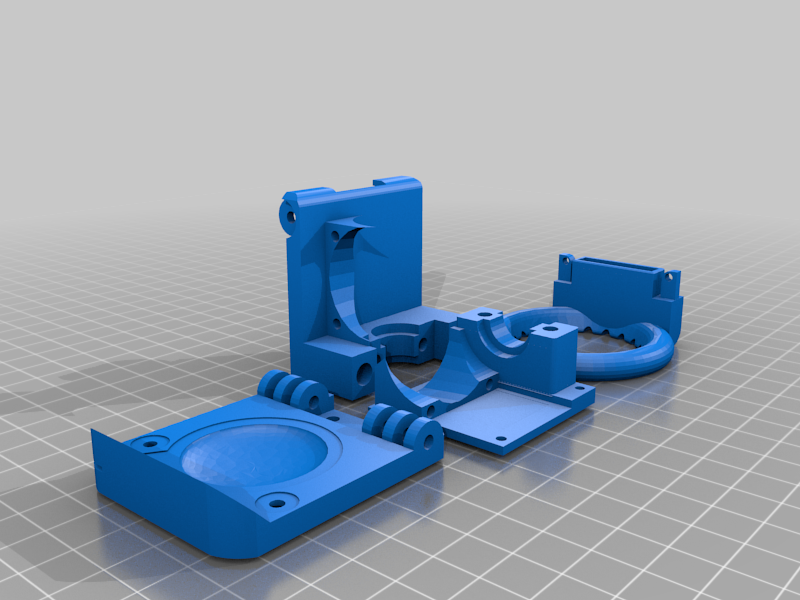
I designed the carriage to clamp around the belts, once clamped down you can tighten the belts with the steppers in the back. Once tightened you can finish assembling the hotend and sensor parts of the carriage. You can make new designs and change the hotend and sensor portion without ever needing to mess with the belts.
As you can see from the video it does work, and as you can see by the cube picture it somehow came out already calibrated by dumb luck. It's about 320mm cubed (1ft cubed).
It's using 210mm, 230mm and 250mm 2020 Series Aluminum Extrusion but should be able to scale to anything (I think), you would just need to alter the Marlin configuration files and get longer rods, belts and a taller/longer worm-screw.
It will only print something smaller than 150mm x 110mm x 120mm with the Aluminum Extrusions and rods at the lengths I used, I will make another larger one later, you should maybe make yours larger to begin with.
WIP BOM (no screw type or screw numbers yet)
2x- 230mm (20mm x 20mm 2020 Series Aluminum Extrusion)
3x- 210mm (20mm x 20mm 2020 Series Aluminum Extrusion)
10x-250mm (20mm x 20mm 2020 Series Aluminum Extrusion)
6x- 250mm 8mm rods (Outer Diameter 8mm x 250mm Cylinder Liner Rail, Linear Shaft, steel, Chrome plated)
8x- 8mm LM8UU Bearing (Igus Drylin RJ4JP-01-08)
3x- NEMA 17 Stepper Motors
2x- Endstop switches
1x- Controller and stepper drivers
1x- ANET part fan
4x- Bed springs
1x- Z-axis Stepper and Leadscrew (NEMA 17 Stepper Motor with Integrated 2mm Lead 255mm T8 Lead Screw)
1x- E3D V6 Hot End Full Kit 1.75mm 12V Bowden/RepRap 3D Printer Extruder Parts Accessories 0.4mm Nozzle
1x- 160x160mm 12V PCB Hot Bed 3MM Aluminum Substrate
1x- Power supply
15x- 2 Hole Corner Bracket Right Angle 20Series Aluminum Brackets for Aluminum Extrusion Profile with Slot 6mm
1x- Micro SD to SD Card Extension Cable Adapter
1x- 15A 250V Rocker Switch Power Socket Inlet Module Plug 5A Fuse Switch with 5Pcs 16-14 AWG Wiring 3 Pin IEC320 C14
1x- Install Bay 89-00-9031 ABS Plastic 12 X 12 X 1/8-Inch (used to mount the power supply and controller board at bottom)
1x- BMG Extruder Cloned Btech Bowden Extruder Dual Drive Extruder 1.75mm
1x- Heat Bed Power Module Expansion Hot Bed MOS Tube for 3D Printer (MOSFET to run heat bed, it is an ANET controller board after all)
1x- ROKO SN04-N (but I would recommend the TRONYX XY-08N instead, I only used the SN04 because I already had it, the 8N works better on my A8 through my glass bed)
6x- Timing Belt Idler Pulley (16T) (16Teeth, 3mm Bore Aluminum) 6mm Width Timing Belt
2×- Timing Belt Idler Pulley (0T) (Smooth, 3mm Bore Aluminum) 6mm Width Timing Belt
2x- 16 Teeth Timing Belt Pulley (with screws for stepper motors) 6mm Width Timing Belt
106x- 20x20 European Aluminum Extrusions Slim T-Nut M5 Threads (at least this many, some could be slide in only, most will be twist into place) (29-back, 12-front, 24-side, 8-inside, 15 brackets, 14-aux, 4-feet)
2.5 Meters GT2-6mm Belt (GT2 timing belt, rubber, fiberglass reinforced, 6mm Width Timing Synchronous Belt)
Links (I shop mostly on Amazon because it can get here in a day, but usually at 3x the price you could find this stuff on Alibaba, AliExpress or Ebay):
I don't endorse any of these vendors, these were the ones that I chose for whatever reason at the time. If you have the time I would order all these from cheaper vendors.
https://www.amazon.com/gp/product/B01N1JP7AD/
https://www.amazon.com/gp/product/B07HNWSMXY/
https://www.amazon.com/gp/product/B07Q472C3H/
https://www.amazon.com/gp/product/B07RBL4CJC/
https://www.amazon.com/gp/product/B076WYMGBQ/
https://www.amazon.com/gp/product/B01HEQVQAK/
https://www.amazon.com/gp/product/B01E91K4N8/
https://www.amazon.com/gp/product/B01D9JIUU0/
https://www.amazon.com/gp/product/B07Q2RR6SC/
https://www.amazon.com/gp/product/B07RYL1ZJD/
https://www.amazon.com/gp/product/B01GCDG2QO/
https://www.amazon.com/gp/product/B07B3PZ7JH/
https://www.amazon.com/gp/product/B07GGLYX9V/
https://www.amazon.com/gp/product/B07RXJ5QND/
https://www.amazon.com/gp/product/B07S1MH4ZG/
https://www.amazon.com/gp/product/B078QZBT8G/
https://www.amazon.com/gp/product/B01FOC6A8E/
https://www.amazon.com/gp/product/B071X1LV7T/
https://www.amazon.com/gp/product/B0773YZTNV/
https://www.amazon.com/gp/product/B07KS2TQ45/
https://www.amazon.com/gp/product/B0007WTF02/
https://www.amazon.com/gp/product/B06XBXDJY3/
ANET parts Info:
I used these just because I had them leftover from upgrading my A4.
The steppers on the A4 for XYZ are model number 42SHDC3025-24B, have a holding torque of 40 N·cm have a rated voltage of 3.96V have a 5mm single shaft, they have a step angle of 1.8° and are 42mmx42mmx40mm and have a rated current of 0.9A.
Similar to these https://www.aliexpress.com/item/32665922113.html
An ANET A4 uses this 12v power supply:
https://www.amazon.com/Aiposen-Switch-Supply-Transformer-Security/dp/B01B2U0DEO
ANETs use endstops similar tho these:
https://www.amazon.com/Aibecy-Printer-Endstop-Switches-Control/dp/B07VCDPVK7/
https://www.aliexpress.com/item/4000166910384.html
Bed Springs:
Like these but you won't need the brass wheels, there are correctly sized printed ones in the download.
https://www.amazon.com/Tegg-Leveling-Component-Printer-Platform/dp/B07PGNJQ2G/
Controller (ANET v1.3):
I use this only because I had a spare one. I would never buy a new one, they are not built well, but here is a link. https://www.amazon.com/Anet-Assembly-Replacement-Control-Mainboard/dp/B07H2CY695/
You can buy a much better board for close to the same Amazon price, you can get them for $5 at Alibaba or Ebay.
The only good thing about the board is that the stepper drivers are built-in, the bad is that those drivers are loud.
LCD Screen (LCD2004):
Here is a very overpriced one. https://www.amazon.com/UKCOCO-LCD2004-Display-Controller-Accessory/dp/B07J3BMGY3/
Here is an cheaper one: https://www.aliexpress.com/item/32814971320.html
Weird ANET fan: (the part fan shroud screws into this):
https://www.amazon.com/gp/product/B07RNZF97F/
This BOM is missing screw type and numbers but I've included the links to all the screws I bought before and during the build, I had none, you will not need all of them by any means but I used screws from these.
Screw Links:
1x- https://www.amazon.com/gp/product/B07DDG19KG/
1x- https://www.amazon.com/gp/product/B073H3GBJM/
1x- https://www.amazon.com/gp/product/B07VNDFYNQ/
1x- https://www.amazon.com/gp/product/B07DRHN4V4/
2x- https://www.amazon.com/gp/product/B07F6YVTR8/
1x- https://www.amazon.com/gp/product/B071KBVZVV/
Cons:
The bed has vertical play so it is hard to get level because of the slop in the back from all the printed parts, but it can be done.
The back bed mounts are printed in such a way that they will likely break if you push or pull too hard on them so I use a magnetic build surface so I don't need to pry on it.
I will likely design a front support similar to the back one and may even add another Z lead screw and stepper.
The SN04 sucks at 5v and won't work through glass, which is why I had it sitting around. I would recommend the TRONYX XY-08N.
The bed is small, the next one I make will be larger.
The ANET board is 8-bit and will stutter doing Core XY math sometimes. When I get tired of it I'll replace it with a 32-bit SKR likely.
The ANET board uses A4988s and they are noisy, TMC2xxx drivers will fix that, but you need a different controller first.
I don't think a 24v power supply can fit in this small size format.
The ANET steppers suck and are 1.8 degree stepping, If I was buying new ones I would use the ones I bought for my A4 upgrade (17HM19-2004S) those have a holding torque of 46 N·cm have a rated voltage of 3.06V have a 5mm single shaft, they have a step angle of 0.9° and are 42mmx42mmx48mm and have a rated current of 2A. But you should use them with a 24v power supply (that likely won't fit). https://www.amazon.com/gp/product/B00W9A2L3S/
When you assemble it you need to plan which type of nut you are going to use before you close up the channel.
Some of the holes are not perfect and are over sized to make up for my A8 printing them wrong, some of them may need to be sleeved and new holes made.
The back is made so that you can adjust just about every piece, this will let it work no matter how bad your printer is, but it will take a while to get them all aligned correctly.
It's hard to get things to stick to this build surface, large things are fine, but small prints usually break free, so use a brim for better results.
The ANET board doesn't have enough RAM to enable all the Marlin features I would want.
I did some layouts in Cura for a 210x210 bed and at .3mm at 80mm/s it says it will take about 48 hours total.
I think it's best to print only a few a time, but the layouts are there in case someone just wants to send it out for printing. It could be printed in 12 hours on 5 printers.
The layouts go real close to the edge and will likely warp without a temperature controlled enclosure. Don't waste your time on them if your machine is not up to it (mine isn't).
Update 2020-01-22:
Added a front panel for the other ANET LCD with the knob in case someone might have that one instead.
Update 2021-01-01:
I created a version of the head for use with a piezo speaker as a sensor probe, you will need to buy a piezo sensor kit for the electronics.
Here is the link to the parts.
https://www.tinkercad.com/things/az0sfuiTYUC-anet-corexy-piezo-head-wip