Easy Make Switch
 par AccessibleDesigns


Fichiers imprimables (6)
-
 stl
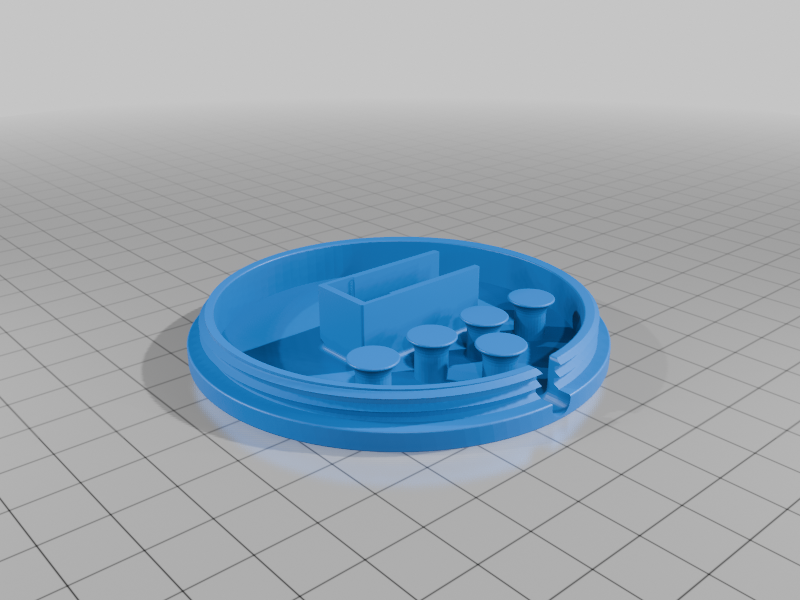
stlEasyMakeSwitchLarge.Base.stl
1 Mo · 109 téléchargements
-
 stl
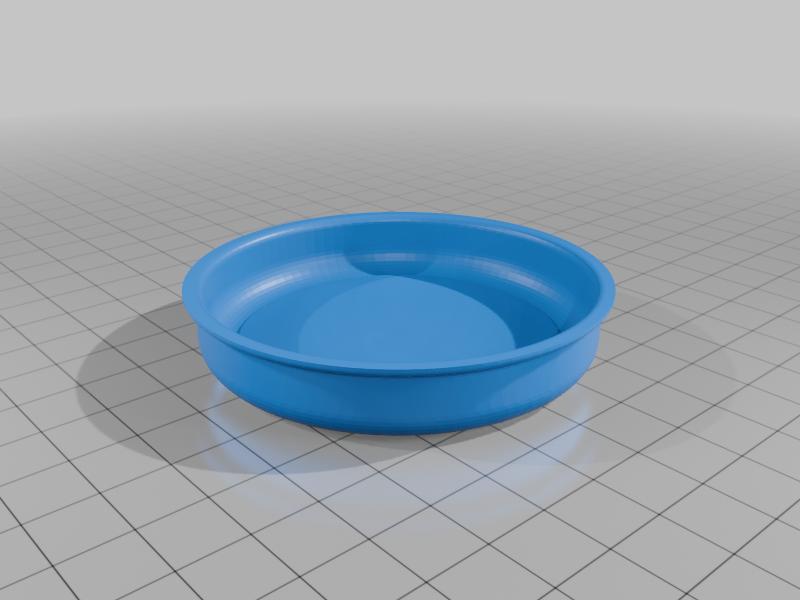
stlEasyMakeSwitchLarge.Button.stl
435 Ko · 104 téléchargements
-
 stl
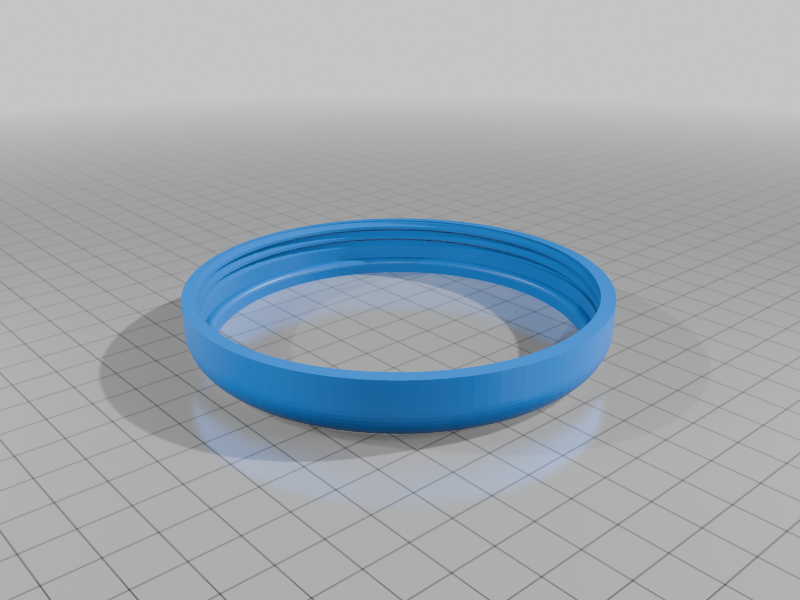
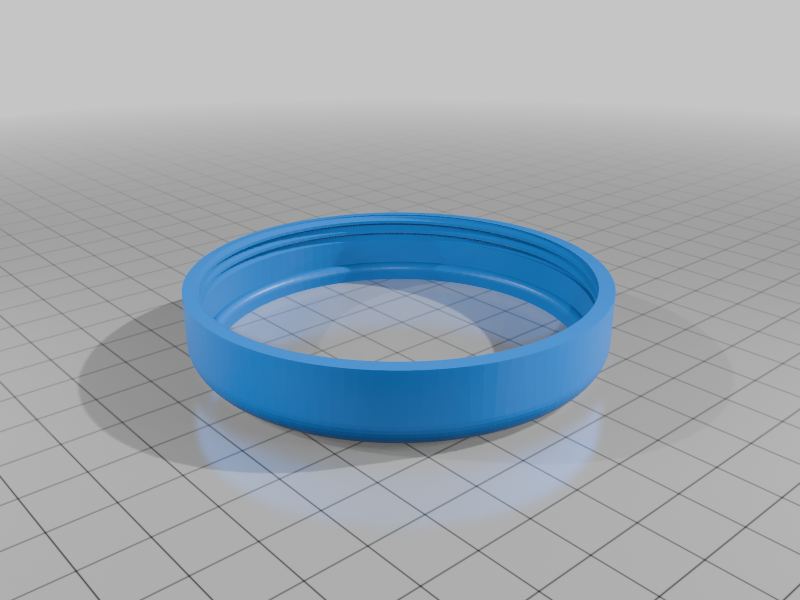
stlEasyMakeSwitchLarge.Ring.stl
461 Ko · 109 téléchargements
-
 stl
stlEasyMakeSwitchSmall.Base.stl
922 Ko · 100 téléchargements
-
 stl
stlEasyMakeSwitchSmall.Button.stl
425 Ko · 99 téléchargements
-
 stl
stlEasyMakeSwitchSmall.Ring.stl
436 Ko · 100 téléchargements
Description
Printing:
I have only printed this with PLA and it works very well.
Large and Small sizes are available in the files.
Print all parts at 15% infill, .20 mm quality, no supports needed.
Add a brim to the switch ring when you print it for better results.
The switch ring and button top should be printed upside down (I already flipped them in the .stl files)
Constructing:
I have uploaded a video for construction instructions at this link.
https://www.youtube.com/watch?v=USw0kOjd8pc
Construction Supplies: All links are for amazon purchases. You can find things cheaper by searching other more technical sites, but this is The Easy Make Switch, so I wanted to give you Easy Order parts.
1x Male 3.5mm mono audio jack with 3-6 foot of cable. Male, mono jack on one end and bare wires on the other.
This link is for a 2 pack of 6 foot long cables with male ends on both ends. I cut them in half and it gives jacks for 4 switches for only $10 total.
https://www.amazon.com/dp/B09K38YKGH?ref_=ppx_hzsearch_conn_dt_b_fed_asin_title_1
1x Micro limit switch, V-15-1C25.
This link is for a pack of 6 for only $9
Twidec/6Pcs Snap Action Button Micro Limit Switch 125V/250V 16A SPDT for Microwave Oven Door Arcade V-15-1C25
2x Red Female Spade Connectors (22-16AWG)
These come in large packs. Here's the smallest pack I have found and is only $7.
https://a.co/d/7XlnjcB
Wire Stripper/Crimper Tool
You may already have this or someone you know. But if not, here's an inexpensive one for $13:
https://a.co/d/1lWrZic
Goal 1: Accessible for all.
The Easy Make Switch is very accessible for people with motor impairments. I work with children with neurological conditions, and I have used this switch with many of them to access fans, lights, disco balls, toys, etc. It takes only a light touch to access and all areas of the button top work evenly well. This is extremely important for those with motor delays. One of my clients can only control one arm for a few inches of movement and this design works well for him. This is a light touch switch and works well with minimal pressure. However, if your client needs an even lighter touch switch (I have only had one that did), for 3D printing, I would point you to the Interact Switch (address below). for purchasing a factory made product for a good price ($35) I would point you to the Scallop Switch (https://www.aph.org/product/slk-scallop-switch/). The Scallop Switch has a great price and is a handy switch for many folks due to light touch access and due to being able to slide your hand sideways onto it instead of lifting your hand off of a surface (hint, remove the suction cups and add velcro instead for mounting to a tray or table top).
Goal 2: Easy to make.
NO SOLDERING NECESSARY! The Easy Make Switch is easy to print and easy to construct. I have worked with a number of other 3D printed switches and there are some good designs out there. Especially the Interact Switch ( https://www.thingiverse.com/thing:4570894 ). Respect for that design! However, for those who can print 3D parts or get them printed by friends, the assembly of these take a little more technical know-how. Also, I have had a hard time finding the parts online for this switch. My main goal was to remove soldering, remove adding nuts or bolts into the printing process, and make it where anyone could construct it. I teach therapists how to 3D print assistive devices. I believe switches are one of the best uses of 3D printing for accessibility needs, however many of my class participants tend to get hung up on soldering. I made this switch so it would be easier for the less techy among us to get it printed and put it together.
Tips for use of this switch with individuals with motor and strength impairments:
Everyone can use a switch to control something in their world. My clients with the weakest strength, most limited mobility or with deafness or blindness can all use a switch if I find the right one, mount it the right way, and get it to turn on something that matters to them. I have worked in my field for 22 years and have not had a client yet who could not access their world better. It just takes some problem solving.
Try mounting this switch with Velcro. I put hook Velcro (rough side) on the switch base and loop Velcro (soft side) on the mounting surface. I mount to trays, tabletops, parts of the wheelchair, and CELL PHONE MOUNTS! Flexible neck, cell phone mounts are cheap and with some Velcro on them become mounts you can use to place a switch in the path of whatever body motion your client/friend/family member has control over. Think hand, elbow, knee, head, feet. If they ever move any part of their body, in any position (laying down, in a wheelchair, etc.). Then mount the switch in the direct path of that motion while they are in the position in which they can control it. With problem solving this will happen. Keep at it until you find the one that works. Here's a link for a flexible neck, cell phone mount for $14.
https://a.co/d/8gpXiHjFind what matters to the person using this switch and help them run THAT. First, if it's going to take learning, you are going to need their motivation. And they are only going to be motivated if they intrinsically care about this! Second, helping someone control a device in their world that they care about, that gives self-determination, improved quality of life, an activity that other people will start talking to them about (increased social engagement), they can prank their siblings or annoy them (also social engagement). I have one kid who loves turning cool stuff on and experiencing the sensations. But he likes to turn them off the most because I act all offended and he thinks that's hilarious!
- Battery powered devices: With battery interrupters or modified toys there are many battery powered objects you can run with a large switch. Fans, lamps, toys, more toys, sound makers, etc. There are switch modified toys for sale all over the internet, or you can modify them yourself with a switch interrupter.
You can make your own battery interrupter: https://www.youtube.com/watch?v=3wEjZ0Vw5us
Or you can purchase one for $16:
https://a.co/d/eViXxed
Modify your own light up wand: https://www.youtube.com/watch?v=v_WIkTb2AVk
Modify your own back massager: https://www.youtube.com/watch?v=zZa79_P3hPU
- Plug in devices: If you run this switch through a switch interface (not cheap unfortunately, but worth it to help someone access their world!), you can run any item that plugs in and only needs to be turned on or off. If you need to plug it in and ALSO have to select any other settings before it will do what the person wants it to do, it will not work with a switch access. Switch access only replaces the on/off switch function.
Switch Interface $330: https://a.co/d/icrhsZy